What is Lightroom’s Tone Curve Tool?
Well the answer to that question really lies in the details of what you are trying to accomplish with your post production. The Tone Curve tool is designed to allow you to modify the various light levels found within an image in a way that will give you greater control over the tonal range and contrast of your photograph.
As we capture our images we are capturing an array of light from the scene. From the darkest of the shadows to the whitest of the highlights the Tone Curve gives us a way of visually modifying how these levels of lights appear in the final image.
With the changes made to the basic tab back in Lightroom 4 the Tone Curve tool certainly doesn’t boast the power that it once did in comparison, but that doesn’t mean it’s useless. Today I’m going to show you how you can use the tool to modify your images and squeeze every little bit you can out of the tonal range that you’ve captured. As I’ve numbered above there are five ways that we can modify our images using the tool – let’s break them down now.
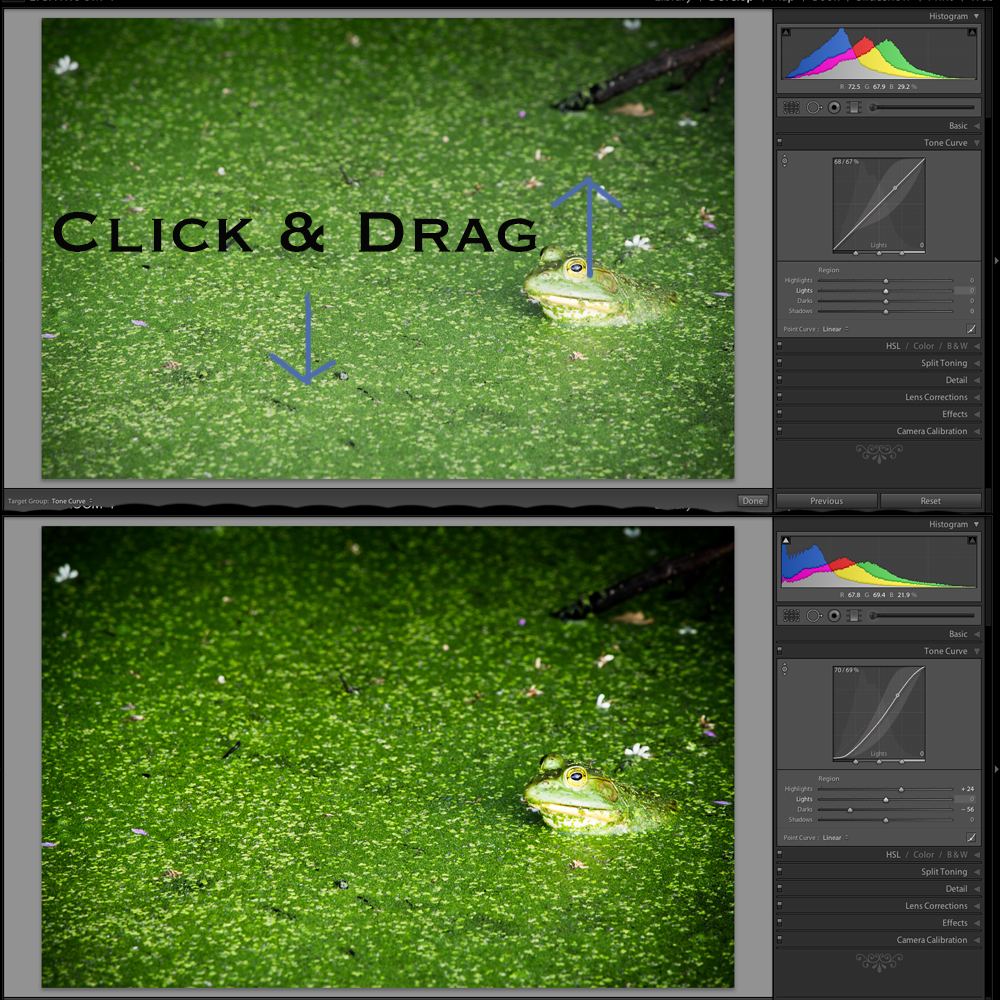
Number 1 – Make Tone Curve Adjustments by Dragging In Your Photo
I honestly didn’t even notice this button until I started doing research for this article, but it does add a cool little function to the Tone Curve. By clicking on this button your mouse cursor will change allowing you to click and drag within your photo to make adjustments.
As you hover over your image you will notice that a point appears on the Tone Curve in the box to the right. As you move your mouse this point will move according to the light level of the area you are hovering over which makes it easy for you to determine what levels of light need adjustment in your image.
To use this tool simply click and drag up for more or down for less effect of the selected light level. It is important to note that this is a global change so it doesn’t just effect the area where you’re hovering, but all like pixels within the image.
You’ll notice in the image below I dragged down on an area in the green algae and up on a highlight on the frog’s face. The result is more contrast in the final image. Please keep in mind that the examples in this article are extremes done to demonstrate the tool and not necessarily how you would use it in practice.
Number 2 – Adjust Tone Curve by adjusting the curve itself
The Tone Curve itself is something that you can modify simply by clicking and dragging on the areas you wish to change. As you hover over the curve you’ll notice different pieces of the curve will be highlighted to show you what levels of light you are going to effect with your changes and how much room you have to make these changes.
In this photo I added a little more contrast by dropping a point towards the shadows end of the curve and raising a point towards the highlights end of the curve. This can be done in a similar manner with the sliders below the curve (see number 4 for that example).
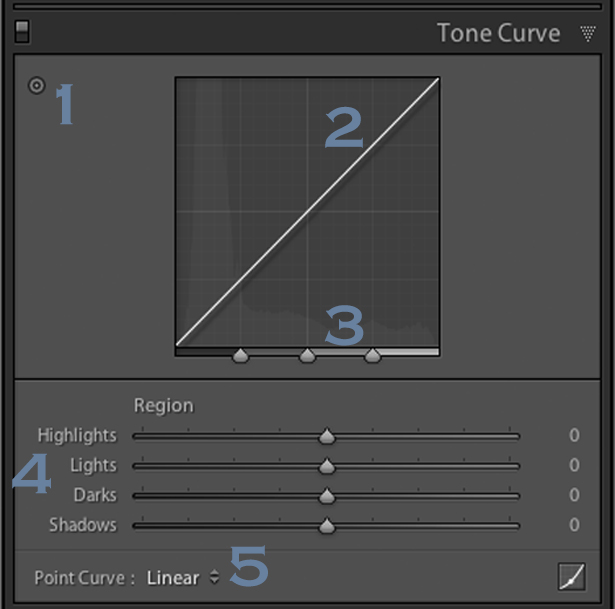
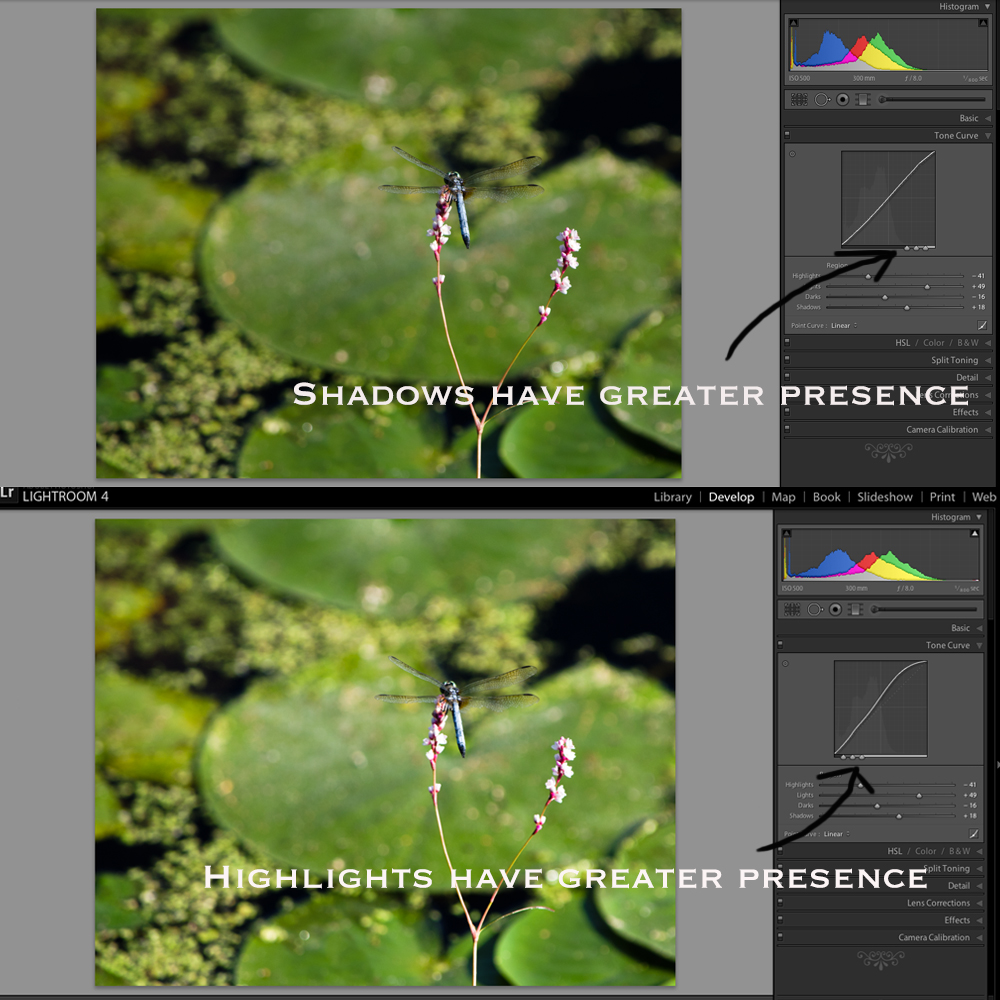
Number 3 – Adjust the strength of each light level’s region
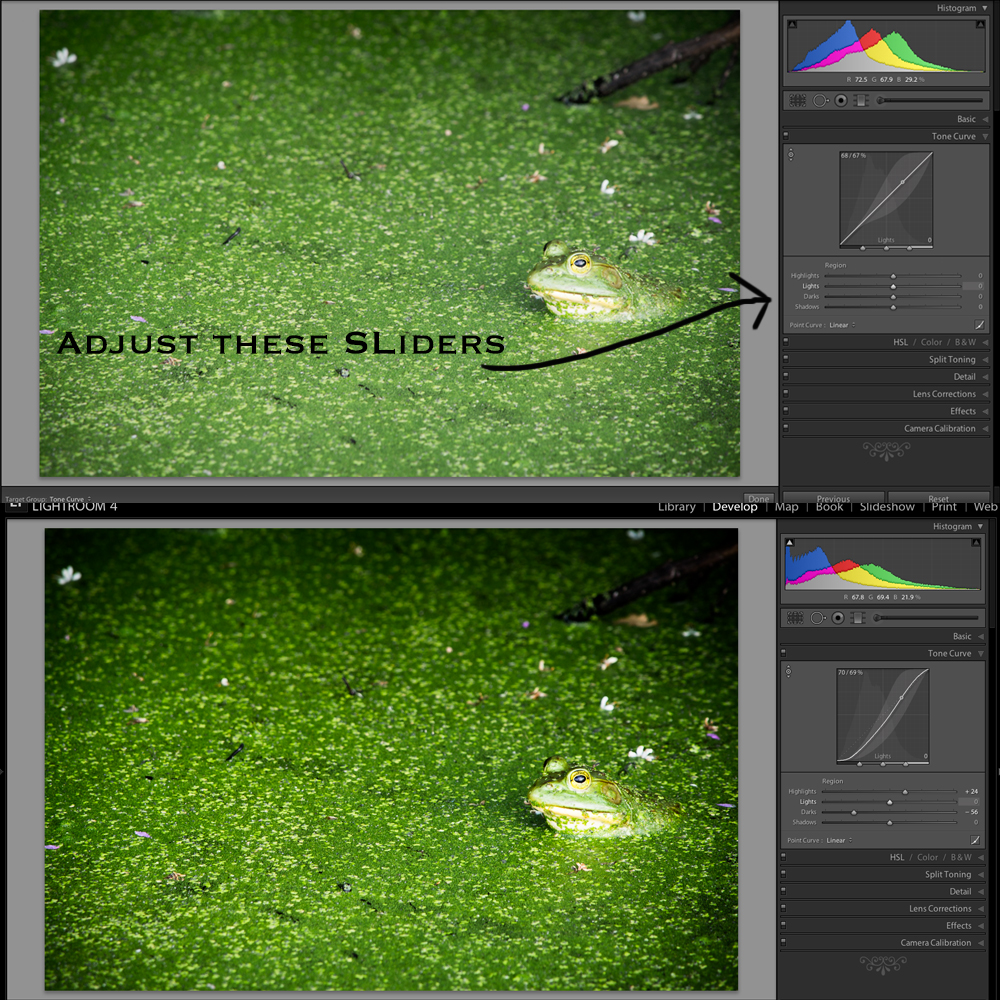
With this area of the tool we’re controlling the amount that each ‘region’ of light (highlights, lights, darks and shadows) effects the image.
The default settings (which are set in the modified image of #2 on this list) are set at 25, 50, 75 for the three sliders. In the first image below I’ve slid all three sliders to the right (an extreme example I know) which gives the shadow tones a greater impact over the overall photo. In contrast to this, the second image I’ve slid the sliders to the left which as you might expect gives the highlights within the image more impact. In most cases I never touch the default settings, but they are good to be made aware of and might be useful one day when processing a specific image.
Number 4 – Adjust using the familiar slider set up
Much like the sliders from the basic panel the sliders in the Tone Curve work in a similar manner. Slide left to lower a setting, slide right to raise a setting, double click to reset to zero.
It’s very straight forward and is important to note that it doesn’t do anything different than the other two methods I mentioned above. In fact you’ll notice that when you make any adjustments whether using #1, #2 or #4 the sliders and the tone curve will move to their respective positions regardless of which method you use to make your adjustments.
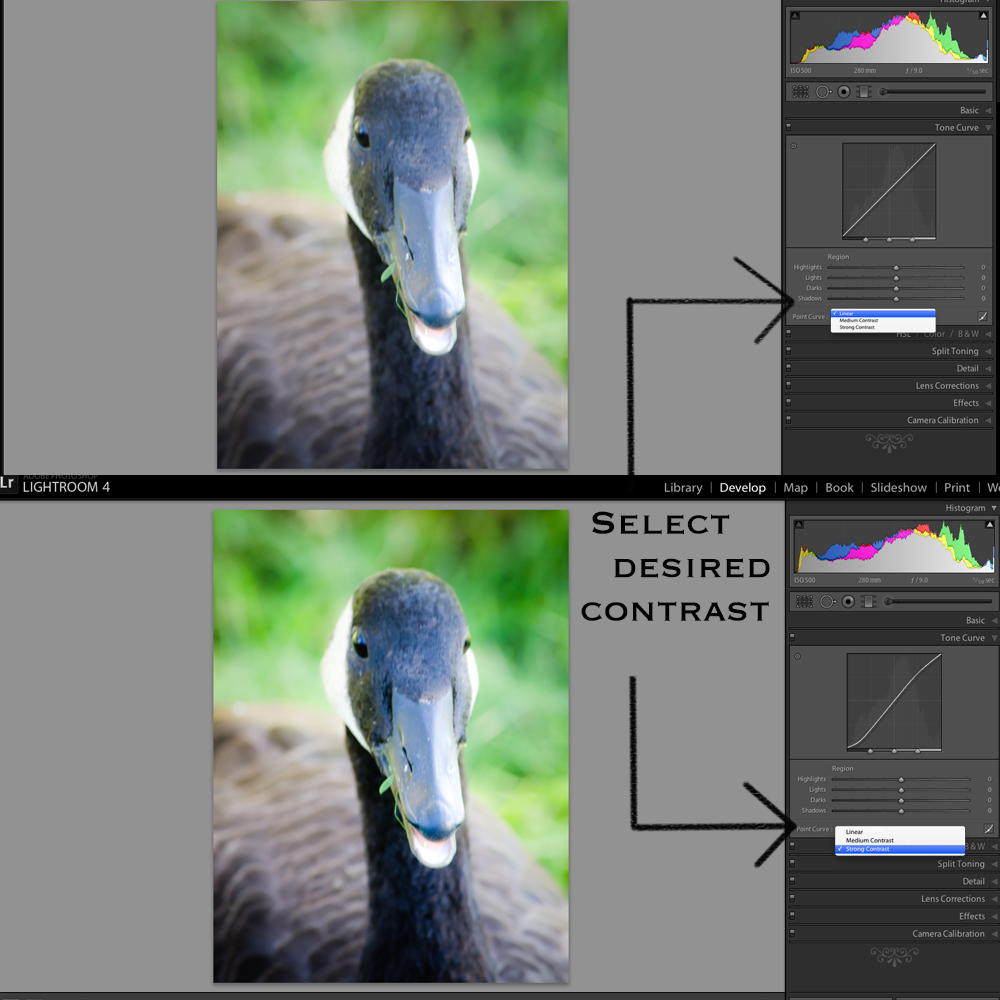
Number 5 – The Point Curve Presets
Today we are going to only be talking about the three presets of the point curve and save the button in the lower right corner for another day – the presets are as follows – Linear, Medium Contrast and Strong Contrast and as you might expect the names pretty much say it all.
Linear contrast is a default and fairly flat setting and when using this setting you’ll notice that the curve is a straight line from the lower left corner to the top right corner. Medium and Strong contrast presets effect the ends of the curve in either a subtle way or a less subtle way changing the amount of contrast that is applied to the image simply by expanding the ranges of light at the ends of the curve.
In the example below I’ve simply switched from a Linear Curve to a Strong Contrast Curve to show the differences.
When Would You Use the Tone Curve?
So now that we know how to use the tool, the question remains, when would you use it? I find that in my typical workflow I rarely touch the Tone Curve except for a small tweak here or a slight adjustment there. In my eyes the tool is designed to be a final adjustment to your images. Need a little extra shadow detail? Pull them down just a hair. Need some stronger highlights? Pull up on the highlights slider just a bit.
Of course you can get really creative with the Tone Curve to create some very unique and interesting effects and you can even click on the button that I didn’t cover above in the lower right hand corner and have access to the RGB scale and not only modify the overall tonal range, but the range specific to each color level in your photograph – but that’s an entirely different article.
Do You Use The Tone Curve?
With all the power that Lightroom offers in the other areas of it’s program it’s very easy to overlook the tone curve, I know I did for years, and even today I don’t go much further than applying one of the preset point curves to a photo, but I’d love to hear if you use it in your regular workflow and if so which one of the region adjustments do you use most often?
Digital Photography School
Read more: http://digital-photography-school.com/lightrooms-tone-curve-explained


![EOS 7D Mark II Information [CR2]](https://lh3.googleusercontent.com/blogger_img_proxy/AEn0k_tW1mZZS4gaRHXptnzIXNRTyu71r6bkW-tdfhiAAdEQNb0sUqZCPeGGnwNtTWGj9BbnAu8bdseUDc4C16CAWmNgoQA5Y5I-ui6UCGIcBVaLS_WzrXJ6nkgsMAWWJeiJg5rUBLgmyoSYTURre8L5VqUccKNqHUh-cR8fmPoQc9ljnXnQgUsZhNZaPsqGAAr8RhjPebDjIfvZRHFIyhngs79BGX3E-bhburm5ULsp_gxVlUycbB3uUCIAhzP5pL9lV-mELLxfeuLq3Li1AvWjjP7sacA=s0-d)